The Jedi Academy Report
Jedi Academy is a first/third person shooter made by Lucasarts in the
Star Wars universe. It is latest chapter in the Dark Forces/Jedi Knight
story, and is the stand-alone expansion pack for Jedi Knight 2: Jedi
Outcast. It takes place well after “Return of the Jedi.” You play as
Jaden Kor, the newest Jedi in training accepted to Luke Skywalker’s Jedi
Academy, and you are trained by Kyle Katarn, hero of the Dark Forces,
Jedi Knight, and Jedi Outcast.
I have chosen to report on the single player aspect of the game, there is a
deep multiplayer mode with many great features, but the single player game
is sort-of open ended in the order you can take through the game, the Force
powers you can choose, and whether you join the light side or dark side by
the end of the game.
This is the first part of a three part report. The report contains many
spoilers like a walk-through.
Jaden Kor

|
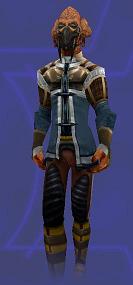
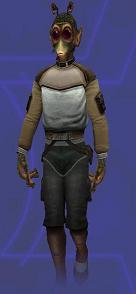
When you start a game you can create your character from a set of pre made features. You can choose Jaden’s race and gender, between human (top left and right), Kel Dor (middle left),
Rodian (bottom left), Twi’lek (middle right), and Zabrak (bottom right). Humans can be either male or female, but
Kel Dor’s and Rodians only have male versions, and Twi’lek’s and Zabrak come
only as females. Each race and gender has about 4 different of each heads,
torsos and legs you can choose; they serve to give you some graphical
customization for your character. They do not have any influence on game
play, one race or gender is not better at anything than any other.
Depending on the gender of your character their voice will be the appropriate
timbre during cut scenes. A quick note about health, you have 100 health
and 100 shield, health can be restored by some force abilities and items you
find around the levels, shields can be restored by shield packs and shield
recharging stations, having 100 health and 100 shield (being at full) is the same as having 200 health.
You can also customize your light saber; at the start of single player you can only use a single saber, and only on medium style, (I’ll get to what this means later) but one of this games main selling points is that you can wield dual sabers or a light staff like the one that Darth Maul used in Episode 1, and you can get those in single player, but not initially, they are all available in multiplayer. Customizing your saber involves choosing from between about 10 different hilts or handles and 1 of 5 blade colors: blue, green, orange, purple or yellow.
I was kind of disappointed at the visual customization options available to you; all of the alien races being constricted to one gender, and not many alien races to choose from. If there hade been more races to choose between and you could select their gender it would have made up for the lack of large variety. (Only 4-5 visual choices for the 3 different body sections) I had also wished for more customization options on the sabers and their colors. (I was really looking forward to having a white light saber when I heard about the option to choose saber blade colors) But really the game is about saber fighting, and not making the character that suits your fancy.
|

|
|

|
|

|
The Force

There are 8 neutral force powers that level automatically as progress through the single player game, and then there are 4 light side powers and 4 dark side powers that you can choose to specialize in as you progress. Each power can have 1-3 points assigned to it, with more points in a particular ability, it becomes more powerful, but you only have so many points to go around. New points are given for each mission you accept, if you accept every mission you can have 15 points to spread over the light and dark side powers. In single player you start with all of the neutral powers at level 1, and they improve automatically, so you don’t have to spend any of your 15 points on the neutral powers.
During play you have a meter that tells you how much force power you have available, you always start with 100, and it refills quickly to the max if it is not being used, it takes about 20 seconds for your Force meter to fill from 0 to 100. Some abilities are set on timers, and not until the power is done being used will your force begin to refill.
Neutral Force Powers
The neutral powers (located in the center) are: Jump, speed, push, pull, sight, saber toss, saber offense and saber defense.
Jump: jump allows you to jump much higher than normal; it also allows you fall from greater heights with out taking damage. Level 1 you jump about twice as high as a regular jump, Level 2 about 4 times as high, and level 3 you jump a whopping 8 times higher, allowing you to scale great heights. 5-50 Force power used depending on height of the jump.
Speed: speed slows down the world around you, a la “The Matrix,” each point in speed, makes everything slower and the speed boost lasts for a longer time. In multiplayer using speed speeds you up, as opposed to slowing everything down. 50 Force power used per use (force won’t refill until your speed boost has ended.)
Push and Pull: these two powers are very similar in function, they allow you to knock enemies over and manipulate objects in the environment, and are sometimes used to solve puzzles, you can also move weapons and ammo around (usually you just want to pull it toward yourself). Push will allow you to push enemies standing on ledges over them, and there is a saber combo move in which you can pull an enemy toward you and slash them with your saber as they are in motion. 5 Force power each use.
Sight: this ability will light up weapons, ammo, friends, and enemies with colored outlines, making them easy to spot, and it works through walls, so you can see around corners to an extent, or know what is through a door before opening it. It will also reveal some invisible things such as switches and is used to solve some puzzles during the game At level 3 it will show a health bar of enemies if they are close enough, giving you a gauge of how soon until they die. 20 Force power used (force won’t refill until your sight has ended.)
Saber Toss: saber toss works like it sounds, you throw your saber out in a straight line, it twirls horizontally as it flies, then gets pulled back to you automatically, things can prevent it from getting back you right away, for example if you toss your saber, then run around a corner before it gets back it will fall on the ground, but it will automatically come back in a few more seconds. You can never loose your light saber for more than a few seconds. I don’t like to toss my saber because for that time you have no defense which can kill you. 20-100 Force power per use, depending on length of throw.
Saber offense and defense: these are passive abilities that improve your saber fighting skill. As your offense ability goes up, your hits can do more damage, and you can always break saber locks of lower level offense enemies. (See saber fighting section) Saber defense will allow you block more attacks and also deflect shots back at where they cam from, allowing to kill people that are shooting at you from a distance with just your saber and no force power. 0 Force power used, these abilities are always on.
Light Force Powers
Light side powers (on the left) are: Jedi Mind Trick (called mind trick), Heal, Absorb, and Protect.
Mind Trick: mind trick allows you to confuse lesser enemies making them oblivious to your presence. Enemies are only unaware of you for a few seconds, or until you attack them personally (you can attack others next to them and this will still be confused) Level 1 can only confuse 1 enemy, level 2 can confuse multiple enemies that haven’t yet noticed you, and they will stay confused for longer, level 3 can confuse multiple enemies, or can turn single enemies to your side for about 30 seconds, they will follow and fight for you even if you attack them until the mind trick wears off. Mind trick only works on the weak minded, and not on droids, or Jedi, and there are a lot of Jedi in this game to fight against. No enemy in single player will ever mind trick you. 20 Force per mind trick.
Heal: this one of the most used abilities in the game, and it comes highly recommended, at great expense of force power. At level 1 you must sit down and turn off your light saber and stay still to heal, it uses 2 force to restore 1 health, so using all your force power restores 50 health, and it takes about 10 seconds to use all your force to heal, level 2 you can move and still heal, but healing stops if you fire or are hit, and the healing rate is the same as level 1. At level 3 you can fight while healing, and be hit, and the healing rate is increased drastically, it takes about 2-3 seconds to use up all 100 of your force power to heal. 15-100 Force power used, depending on amount to be healed and force power that you currently have.
Absorb: absorb will guard you from your enemies force powers, once absorb is activated you are surrounded by a blue layer, and you cannot be pushed, pulled, drained, lightninged, or gripped. If anyone tries to hit you with Force powers while absorb is on, it will fill your Force meter. For example, if someone tires to shoot lightning at me and they use 40 Force power doing so, and I have absorb on, not only do I not take damage, the 40 Force power used to lightning is added to my Force meter. Level 1 absorb absorbs only 1/3 of force damage, and it ramps up evenly, so at level 3 100% or Force damage is absorbed and converted to my Force power. 30 Force power per use (force won’t refill until your absorb has ended.)
Protect: while absorb only guards against damage done by the Force, Protect guards against all other damage, done by blasters, explosions and light sabers. And activating them both makes you dang near invincible. Activating protect puts a green layer around you, if you turn on both absorb and protect the layer over you will be a bluish-green. At level 1 protect will stop 25% of non-Force damage, at level 2 it will stop 50%, level 3 will stop 90% of damage, so you cannot become totally invincible, but almost. Protect costs 30 force per use. (Force won’t refill until your protect has ended.)
Dark Force Powers
Dark side powers (on the right): these are Drain, Lightning, Grip, and Rage.
Drain: drain is the dark side version of heal, it sucks life out of enemies and restores it to you. It only works on living beings, not on droids or machines that you occasionally fight. At level 1 you must make physical contact with your enemy to drain them, which is ok because they are stopped while you drain them, but enemy Jedi’s can push out of being drained. At level 2 you can drain life from an enemy from a short distance, and level 3 will allow you to drain several enemies at once from a short distance. Drain will restore your health faster than all but level 3 heal, and for less force power, but you are often in danger while draining (there must be enemies to drain from) and often at the end of a fight you want to heal before moving on, but if everyone is dead you can’t drain them. Although drain does do damage to enemies, it doesn’t often kill them. 15-100 Force per use depending on amount drained and remaining force power.
Lightning: lightning allows you to shoot lightning from your fingertips like the Emperor in Episodes 3 and 6. Level 1 shoots one short weak pulse, level 2 you can shoot continuously, but still not very damaging, it takes a lot of Force power to kill even weak enemies, and it still only hits single foes. At level 3 this ability really shines … or crackles… or whatever, it does much more damage per second and can hit several enemies at a time. You can use it to clear rooms of all minor enemies very quickly, and if you retract your lightsaber you can shoot lightning from both hands, increasing your damage output further, and the damage from lightning is effective against all targets except those with absorb on. Lightning level 3 also has a push ability built into it, as enemies are being shocked they will sometimes be thrown up into the air and pushed back, sometimes allowing you to use it to throw foes off cliffs. 5-100 Force used up depending on amount of damage you want to do.
Grip: grip allows you to grab a single enemy and damage them. At level 3 you are able to move them around while they are gripped, you can use one foe as a human shield against another enemy, slam them into walls, and even throw them off cliffs. Once someone is gripped they will drop their weapons or turn off their lightsabers, this allows you to get free hits on enemy Jedi. One can escape grip by Force pushing the Jedi that is gripping them. 20 force to begin gripping and force is slowly used up as your grip continues.
Dark Rage: rage allows the Jedi using it to become faster, hit harder, resistant to damage, and unable to die. You can still take damage while in rage, and can be killed immediately after rage ends, but while it is active you are very powerful. As an additional cost to using rage, it slowly drains your life. You can tell is if someone is using rage by red lines that are running over them. Rage has a cool down of 10 seconds that you must wait before it can be activated again, and requires at least 25 health to be able to be used. Level 1 rage will block 50% of damage and all levels allow you to do more damage and offer protection from death. Level 2 blocks 75% of damage and gives a 25% increase in speed, level 3 blocks 90% of damage and gives a 50% speed boost. 50 Force power is used each time rage is used (force won’t refill until your rage has ended.)
The Lightsaber
Since so much of this game revolves around saber combat that I thought it would be good to explain it some what. You can choose to use a single saber, dual sabers, or a light staff. Saber fights are often fast and frantic, since well placed hits can kill people in one hit, (which is as it should be) but some fights get drawn out into slow “whittle each other down” battles, and people with healing abilities will often win those matches. There are a number of moves that can be executed, stabs, jabs, swings and spins. You will swing vertically if you are moving forward or back, horizontally if you are strafing right or left, those are the basic moves. If you duck while running, you will do a short roll, and by attacking can do a stab, that is nearly always a 1-hit-kill if it hits. By hitting regular and secondary attacks at the same time you can perform a spinning attack with your saber. There are a few other moves that can be performed like jump attacks and pinning people into the ground with your saber, but most of the special moves don’t work against the more powerful Jedi that you face at the end of the game, so you have to duke it out with them.
Occasionally while fighting you can get into a saber lock with your opponent. Saber locks are if two Jedi swing at each other and end up pushing sabers against each other, whoever wins the saber lock nearly always kills their opponent in one hit. You can also push out of saber locks with force push, doing this separates the 2 duelists so there will be no one-hit-kills. Saber locks are dangerous because you can die if you lose it, but you should always win against weaker opponents.
There are different strengths and weaknesses to each saber type. (Single saber, dual saber or double bladed saber) Single saber users can switch between fast saber style, that can link together many weak strikes, but they are easily blocked, strong saber style that can often break through many blocks but they have a long wind up and follow through leaving you vulnerable during those crucial seconds, and medium style that is somewhere in between the two extremes.
The dual sabers and light staff seem to be more powerful than the single saber, but each has only one style, but there are some fancy 2 directional stabs or jump attacks that can be used with them that cannot be done with a single saber. Often when using dual sabers or a staff, the fights are shorter and I win them more often, but perhaps I’m just out of practice with a single saber.
The levels, enemies and weapons
The game is divided into 3 distinct parts, each part has 4-5 missions to do, you can choose to complete the last of the 5 missions or not, and each part is separated by one long mission. If you choose to skip the last mission in each third of the game you will miss out on a force point for each, leaving you with one less full force power by the end, but you will have gotten to the end sooner. You can choose to complete the 5 missions in each part in any order you choose, allowing you so face the missions that are more difficult for you until later, when you have more force powers, and are more powerful.
There are many enemies to face in the game from stormtroopers to alien mercenaries, to combat droids to Jedi to … well I don’t want to spoil to many surprises of the game just yet. And as a note, when I say that you fight against Jedi, I should say that you are fighting against people that can use the force and may or may not have a lightsaber, you can fight both Jedi and Sith during the game, some Star Wars fans may correct me for calling them all Jedi, but it is much simpler for me.
There are several other weapons besides the lightsaber to use, but the lightsaber will be used about 90% of the time. Some guns of note include the tenloss disruptor rifle; it has a long range scope and can be charged up to totally destroy matter, (people and droids in the game, you can’t destroy boxes or things that haven’t been programmed to be destroyed) and it cannot be deflected with the lightsaber. Enemy Jedi can dodge shots from it every time, so don’t bother trying. The DEMP gun, or electric gun is very effective against droids and machines, killing them in only a few hits, and will stun and damage human targets, it also cannot be blocked with the lightsaber. The concussion rife from “Jedi Knight” has returned. (It was not in “Jedi Outcast”) It shoots a powerful shot that explodes over an area, or alternate fire shoots a long stream that will pierce targets, but not explode, so it requires great accuracy. Neither shot can be blocked with a lightsaber, but the primary (explosive) shot can be pushed back the direction it came from with force push, making it a bad idea to shoot it at enemy Jedi since they will push it right back to you, it requires fast reflexes to push shots fired at you back, it is easier to avoid them and go and kill whoever is shooting them at you. The rocket launcher is pretty self-explanatory, the rockets are very powerful, only if you are at full health will you survive the hit. Rockets can also be pushed back to where they came from, and they move much slower than the concussion rifle shots, so the rockets can be pushed back more reliably by the player. The alternate fire for the rocket can be held down and enemies can be targeted and the rocket will be lock onto them and chase them until they are hit.
So... on to the Game
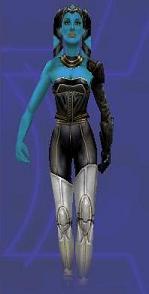
It’s almost to start blowing stuff up, but not quite yet. For this game, Started a new game at Jedi level, the 2nd lowest difficulty level, at this difficulty the soldiers are not to hard, and the Jedi battles are difficult enough. After selecting difficulty, I get to make my character, I chose a blue-skinned Twi’lek female with the one black leather sleeve and white stilettos, and as a side note, choose a character you like to look at from a ¾ behind angle, because that is what you will see a lot of during the game.

The game starts with the good ol’ Star Wars word crawl. In it, it explains that Luke Skywalker has searched out the best and brightest to become the next generation of Jedi knights, and that you, Jaden Kor, are among them, and that you stick out above the others because you made your own lightsaber without instruction. (It’s not that hard, you just pick a hilt and blade color) While in transit one of your fellow students, Rosh Penin, gets chummy with you and tries to spark up a conversation with you, but your friendly chat is interrupted by an explosion in your shuttle’s engine, as a result your ship crashes and you and Rosh are separated from the rest of the students and stranded in the jungle.
**********Action starts here*********


You and Rosh are radioed to make your way through the jungle to the Jedi temple. You have your lightsaber and Rosh has a blaster, you can see the crashed shuttle in front of you and Rosh is up on a ledge in the jungle, and he asks you to chop down a tree to make a path for him to get down. No sooner do you do that than you are jumped by some howler lizards, but they are quickly dispatched by some blaster fire by Rosh, and your lightsaber. Howlers are not hard enemies, if you run headlong into them they will begin to howl (strangely enough) and do damage to you, you can still move if they are damaging you, but cannot attack, but you can sit back at a distance and kill them with a quick saber toss. The two of you continue on your way, fry a few more howlers and cross another improvised tree bridge and then come to a door that Rosh is polite enough to open for you, and then you stumble on two stormtroopers, and Rosh bravely suggests that you should take them on, since you are the one with a lightsaber. You move out and quickly slice them up, and in the small canyon below you a Sith drops down and calls you out to fight. So you drop down and introduce yourself by slicing him up. As a note, whenever a Jedi is killed in a saber fight, the game goes into slow motion and the camera pans around you in an attempt to give you a cool shot of what actually happened, and it even works sometimes. (Sometimes the camera passes behind an object and it blocks the view)

And with that the first portion ends, and you make your way to a temple-looking building, and spot 3 people draining some energy from the building with a scepter, then in a flash you pass out, and are revived by Kyle Katarn, only to find out that the 3 people you saw earlier are gone. You report to him and then Luke Skywalker and your buddy Rosh what happened, and they make profound statements like, “Troubling…” then every one goes back to the Jedi temple to begin training. This action is interspersed with scenes of a Sith Twi’lek woman entering the main Jedi temple and extracting data from Skywalker’s personal records, and later giving them to her master.
Once in the temple you and Rosh are assigned to be trained by Kyle Katarn, and he takes you right out to the training grounds to start. The training grounds give you an opportunity to learn how the neutral Force powers work. You fight some remote droids, (the little flying ball that Luke trains with in episode 4) you jump a broken bridge with Force jump, pull a lever that you cannot reach to open a door, use force speed to get through a door that closes quickly, and force sight to spot wall bricks that can be pulled out to make stairs, use Force push to push a loose wall down, and then your buddy Rosh sends a saber training droid to slow you down, but it goes down in a few slashes, then you make your way back to Kyle, and Kyle reprimands Rosh for sending the droid to attack you. And then you can finally onto the real stuff.
In these first two pre-missions I never saved, since there are really no dangerous spots, unless you are dumb, but I did die twice in my trek to the temple with Rosh. Once was a suicide because Rosh got stuck in his start position and would not move, so I killed my self to reset everything, and the second time, I accidentally smashed myself with a tree that I had cut down.
The Missions

After having Master Skywalker tell you that students learn by doing, you are taken to the mission selection screen, where you can choose among the missions that you have available. There are 5 missions and you can take them in any order you please, and even skip the last one, so if there is one that you just cannot complete you can skip that one, but you miss out on a point to power up your Force abilities. I selected to tackle the merchant rescue mission first, it being the easiest, and no particular light or dark force power will make this one go any faster.
Before you start this mission (and all the others) you are given 1 force point to distribute among the 8 light and dark powers, each power can have 3 points assigned to them, and they cannot the reassigned, so once a point is assigned and that mission is begun, you are stuck with that force point in that power, so spend them wisely. After a few times through the game I decided I want to have Force absorb, Mind Trick, Force heal, Force grip, and Force lightning all maxed out by the end of the game for the last mission. I placed my first point into heal, and I will max out lightning next, then mind trick, then absorb, then grip, then finish maxing out heal.
You are then taken to the weapon selection screen. You always have your lightsaber and a blaster pistol, and you can choose two additional guns and an explosive to start with. You can always pick up other weapons during the missions, but each mission you start only with the ones that you chose. One weapon slot is always given to the Tenloss rifle for its scope and high damage output, and at this level the larger guns are not available, so I take the wookie bowcaster for its heavy damage or the droid destroying DEMP gun for missions that I know I’ll be fighting machines. The only other gun available at this point to start with is the standard issue blaster rifle, I never choose to take it, because I can wait TEN seconds until I kill the first enemy in the mission and he drops one for me to use. I always take thermal detonators over trip mines or demolition packs, because you can throw the detonators much farther than the other two.
Mission 1: Merchant Rescue
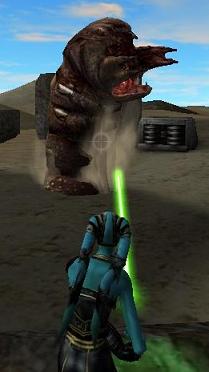

For your first mission you must go out and rescue some merchants that crashed their ship on an uninhabited world. You take a shuttle out to rescue them, and it is struck by lightning during the landing sequence and crash lands near the wreck of the merchant ship that carried the merchants you were sent to rescue. As you survey the damage to your ship, you see the 4 parts that you need to replace, and decide to scour the merchant ship for the parts, should be easy right? As you walk out you the last surviving merchant spots and starts running across the sand to get to you when a giant sand worm pops up out of the sand and devours him in the spirit of the movie “Tremors.” (The first good one, not any of the crappy sequels that followed) But you are still stuck with a busted ship, the parts you need are conveniently scattered around the wreckage, you can use Force sight to make them light up blue (even if they are behind things) and you can climb on ship wreckage or rocks, but occasionally you must cross the sand, the worms will only pop up and eat you if you are standing on sand, but you are safe if you are standing on top of anything. If you use Force speed you can cross the sand before the worms jump out, but they will often pop out behind you and chase you until you are off the sand. The four ship parts must be carried back to your ship one at a time and placed in their appropriate locations, so you can’t grab them all at once and then run back in, and you might occasionally take some falling damage, but there are plenty of health packs in this level to heal yourself back up, and there are some light brown rocks that will sink into the sand once you jump onto them, so jump off them quick.
After you patch your ship back together, you fly back to the academy and are one force point richer for your trouble. I quicksaved about ten times in this mission, but never died.
Misson 2: Droid Recovery

The next mission you decide to take on is the droid recovery mission on Tatooine there is droid that was recent sold to jawas that had some data about the Sith cultists that were seen in the opening sequence, you and Kyle go together on this one, but he soon leaves you to talk to the natives and gather what info he can, while he sends you alone to search for the jawa sandcrawler that left your location not to long ago. I chose to put my next Force point into lightning, and I chose to take the Tenloss rifle and wookie bowcaster with me. As you step into the canyon that the sandcrawler drove through, judging by it’s tracks, sand people spot you and try to take you down. The sand people come in packs of three with sticks to cut you up, and at times there are other sand people with rifles that try to snipe you from far away positions, their weapons do a good amount of damage, but with some practice you can make it so they never can connect a hit before you can kill them.

You fight about 4 packs of sand people until the canyon forks, and there is a building to the right, and a sheer rock wall with some droid parts and frightened jawas down the left fork. There are some high ledges in the canyon that have sand people with guns on them, whip out your tenloss rifle and snipe them once you have cleared out the nearby sand people, there is one sniper that is on a ledge that is behind you. You take the left at the fork and enter the building and there are 4 sand people inside waiting for you, but they go down quickly, the building leads down to a cave filled with crates, and sand people. As you follow the cave, chopping up sand people as you go and healing yourself as necessary, the cave will drop down, and them come back up, eventually taking you to the top of the cliffs that you were below in the canyon. There are some sand people to your left just as you emerge from the exit from the cave, and a few more hiding in building to your far right before you cross the stone bridge to the other canyon wall, so you can go in and take them out, then cross the bridge to the rest of the buildings.

There are 2 packs of sand people on this side of the canyon, and 1 sniper on a roof of a building on the far side from the bridges, in the far left hand corner of the plateau (from standing on the bridges) there is another cave entrance, and this one is much like the first, it winds and drops and rises and is packed full of sand people, once you emerge, you find yourself at the jawa sandcrawler that you have been pursuing, there are about five sand people scattered around the outside of the sandcrawler, take them out and then head to the front door that is opened, pull out the tenloss rifle and disintegrate the sand people guarding the entrance, then the two that are further inside will come running out instead of waiting inside to ambush you.
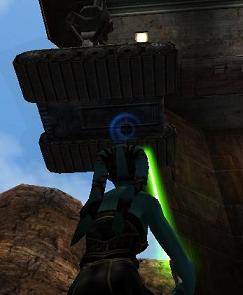
As you move inside the sandcrawler you will see a locked door in front of you and some platforms above you that are too high to jump up to, and Jaden will say something like “How do I get up there?” if you look straight up there is what looks like a short conveyor belt held by an arm above it, you can pull it down with the force and jump on, and then wait a few seconds and it will automatically raise back up so that you can jump to the elevated area in the sandcrawler, on this upper level there are two sand people waiting for you , and from the safety of your makeshift elevator you can shoot them, or just jump across and slice them up. There is another sand person on an overlooking catwalk, you can get to him by jumping on the boxes (check the tops of the boxes for items like ammunition) then get to his catwalk and take him down, then flip the switch that is on the far right of the catwalk. (Standing in front of the sandcrawler and looking in) Once you flip the switch an elevator door on the level below you opens up and sand person with a rifle comes out to the catwalk above you, you can easily dispatch him from below with a gun if you stand in the proper place, so that all his shots that could hit will hit the hand rail on his level, or you can ride the elevator to his level and take him out with your saber. Proceed through the door that he came out from and you enter the sandcrawler proper.

From there you will find yourself standing on a catwalk above a room with lava pouring out from one side into the floor below you, and a pipe on the far wall from the lava. If you want to brave the lava yourself you can drop down to immediately below the catwalk you entered and jump up to and walk across the pipe on the far side from the lava, you will take damage if you do it this way. The wussy (and smart) way to do it is to pull out a gun and look along the pipe for a hole in it, (it is streaming liquid out of it) shoot the pipe at that point and water will begin to flow out of the pipe and cool the lava below you so you can walk across it without taking damage.
The next room has a large pillar in the middle with jets of flame shooting out from either side, blocking your progress. There is one sand person waiting for you as you enter, cut him down quickly, then move to the left side of the pillar on the far side of the flame on the left side of the pillar who will shoot at you, you can shoot back at him, or pull him a few times into the fire, or wait of the opportune moment to jump over the fire, and cut him up.(the fire wall is made of 2 streams, a lower and a higher, and on the left side of the pillar, the upper stream of fire will pulse, giving you opportunities to jump over the lower stream and make it to the other side) Once on the other side there is another switch that will turn off the jets of fire that you did not jump over, revealing an elevator that you can take down into the depths of the sandcrawler.

Once the elevator comes to a stop you are in a room with many angled pillars, and there is a crate right in front of you that you can push out of the way to open the room up some. 4-5 sand people are waiting for you in this room (and also in the next room that looks just like this one) so it may not be a bad idea to turn on speed to give yourself a little edge over them. You pass through the doors on the far side from the entrance and come into a room almost identical to the one you just left, cut down all the sand people and then find the crate pushed into the corner and Force pull it out, behind the crate is the droid that you have been looking for, go up and hit the use key on it, and it will walk to a small door and then drop down back to the outside, and begin moving to the huts, follow the droid, since as soon as it goes outside you will have to protect it from several sand people, defeat them all and the mission ends with you and Kyle chatting.
I had one point in Lightning during this level, and did try to electrocute some sand people, but the damage output is so low and it can only hit one target and the first level that it really was not worth mentioning its influence on the game; lightning, like all of the force powers in the game, works best at level 3, and really isn’t worth having if you are not going to max out. Don’t give up on an ability if the level 1 and level 2 forms are not very good, at level 3 is where they really become powerful.
Misson 3: Mercenary Activity
At this point you skip back to some action back at the Jedi Academy and you get to hear Rosh whine about the monotony of the training, and hear his suspicions that his master (Kyle) is trying to hold him back and keep him from becoming too powerful, as he chats with the other students. But let’s move onto more interesting things. The next Force point given I invested in lightning, making it level 2, still not good enough to consistently fry people. As for weapons I again chose the Tenloss rifle and wookie bowcaster and thermal detonators.
For your next mission, you and Kyle go back to Tatooine to investigate mercenary activity; you land your ship at the spaceport and check things out. You find two things of note, the Millennium Falcon, uninhabited, and also mercenary ships docked there. Kyle leaves you to capture and detain anyone who tries to get to the mercenary ships, while he goes off to talk to some contacts he has. While Kyle is away you hear gunfire getting closer to you, and the door before you opens and Chewbacca comes out, gun in hand. After a conversation (ok… you talk, he grunts) you decide to join forces and kill the mercs that are coming to wipe the two of you out.

Play finally begins and the two of you move through the large docking bays while the mercenaries take pot shots at you from under cover of boxes and doorways, you clear them out then move to the narrow hallways that connect the bays, once you get so far, someone in a room up above activates some tractor beams that hold both your ship, and the Millennium Falcon in place in the docking bays. As the two of you continue to navigate the docking bays, you get pinned down behind some crates, so you decide to go up and disengage the tractor beams while Chewie pushes the mercenaries back. And to finalize you separation, a badly aimed rocket (it was meant for you) blows rubble onto the door behind you, sealing the way back.

You make your way through another room full of mercs and then up to a walkway above the ships to the control tower, if you look closely there are cameo appearances of R2-D2 and C3-P0 in the next room. You finally come to an elevator that raises you up into the control tower, and you power down the tractor beam holding your ship, and as you open the door to the power station that controls the other tractor beam, you see that it is guarded by a Sith cultist. (Just like the one that you fought in the jungle) He sits there and waits for you to make the first move, and for a Sith this inexperienced, that is a fatal flaw. Since he is standing still, you decide to try a rolling stab, by running forward, crouching into a roll, and attacking forward, below his saber blade. The stab is successful and he is killed instantly, and also loses his saber hand at the wrist. You quickly turn off the last tractor beam holding down the Falcon, and make your way back to the docking bays and Chewbacca without incident. Once you arrive, play ends, Kyle returns and complements you both for a job well done, and Chewie gives you noogie, clearly showing his affection. And you call it a day and return to the Academy.


This mission doesn’t have as many enemies as other missions, but they split up over the docking bays and cover each other well, making it hard to divide and conquer them. I performed a lot of push and pins in this area. I push or pull an enemy to the ground and as a special saber attack when you press your normal attack standing still with an enemy on the ground at your feet, you will automatically jump in the air and stab your saber into the ground through your enemy, killing them immediately. Sometimes enemies will be missed by saber swings because of your clumsiness, but the saber pins (the game calls them ground attacks) are a surefire way to take out foes, quickly, one at a time. You can also knock Jedi down and pin them with the saber, but Jedi can roll out of the way, or even perform kicks to knock you down when you try to stab them. The rolling stab done to the Sith faced in this level only usually works on Sith faced in the early portions of the game, as the game goes on, your opponents will always dodge the rolling stab even if they are doing something that locks them into a position, and even counterattack you. I quicksaved probably 20 times during this mission, never died, but took quite a beating from the mercenaries.
Mission 4: Cult Investigation

The next mission that you and Kyle head off for is to investigate reports of Sith cult presence in the planet Corellia. The two of you fly in and are greeted by an emergency message from a cargo tram, telling you that someone is trying to destroy the tram. Kyle drops you at the rear of the tram; while he flies the ship to destroy the other ships are attacking the tram and dropping mercenaries off to impede your progress. I again placed my force point in Lightning, finally maxing it out, and I again took a Tenloss rifle and wookie bowcaster and thermal detonator as my equipment.
As Kyle drops you on the end of the last car of the tram, you look through a window in a door and you see a mercenary setting detonator charges on the ground, but the door is locked (and you can’t cut it open with your saber!!) so you hop into the top of the car and make your way to the front. The way to the next tram car is blocked by a cable connection that is spurting electricity everywhere, so to move on, you need to turn that cable off. Once there you drop down and backtrack inside the car, to make your way back to the merc setting the charges. You are jumped by two gun-toting mercenaries, but they are quickly fried by lightning, moving on you come back to the first merc you saw and chop him up quick and snag his det. packs, and flip the convenient switch to cut power to the fritzing cable, then hoof it back to the next train car in front of you.
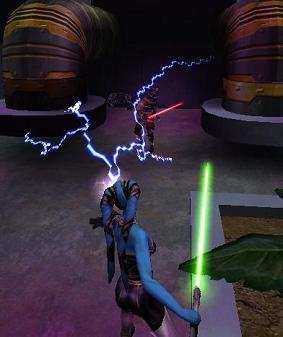
You cross over the top of several cars; fighting enemies, some with your saber, some with lightning, and some with your Tenloss rifle, you eventually make your way to another car with a glass ceiling with a Sith cultist sitting on the top of it. You jump to his car to challenge him and after a few saber exchanges, the glass under him is shattered and he falls into the room below with a mercenary, and the two of them wait for you. You lure the two of them to the front of the car by dropping thermal detonators down on them, and they move to dodge, then you drop down and electrocute them both.

Moving on you scramble over a few more tram cars, eventually finding one that is to tall for you to scale, you move around the outside, finding doors that lead you inside to a few mercenaries guarding an elevator. A short burst of electricity later; you ride the elevator up to the top half of the car to see two enemies cooling their heels behind a powerful force field. You destroy the volatile crates so that no one else can blow them up while you are standing next to them, you take cover, and fire on the small red lights on either side of the force field destroying them, and deactivating the force field. You can now take on the two mercenaries, raid their ammunition store, and get to the roof of the car, and move farther up the tram.
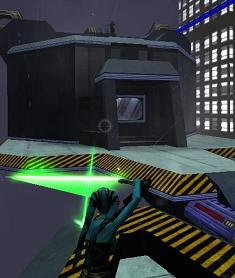

As you cross along the roof of the next car, a mercenary ship flies past you, and it is destroyed by Kyle from your ship. Ahead, you battle another sniper from his perch, but he is quickly disintegrated, and you eventually make your way to an enclosed tram car with a large bomb inside, and another Sith cultist guarding it. You know that the cultist won’t let you disarm the bomb, so you attack him, and finish him off with a horizontal slice, and once again chop off his saber hand (you’ve got a knack for that) and then disarm the bomb. You then receive a radio message from Kyle telling you that some one has sped the tram up to ram it into the docking station and wreak general havoc, and that you need to get to the tram controls and stop it.
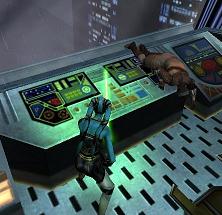
You cross the fuel containers, and kill the mercenaries there to stop you, and finally arrive at the front car of the tram, only to see it guarded by a cultist. As you get close, he jumps down to fight you, but falls to your superior saber skills. Only one mercenary stands between you and stopping the tram. As he dies by electrocution, you move up and stop the tram from the master controls, and Kyle picks you up, and you congratulate each other on a job well done.
This mission is actually quite fun, buildings and other structures fly past you at high rates of speed to give you the feeling of great speed, and while you’re outside, you raise your hand up to your eyes to shield them from the rain, and if any raindrops hit your lightsaber, they will evaporate and steam off. The tram has a slight shimmy to it, and most of the cars shake out of sync with each other, so it can become very hard to sniper distant enemies, they will dance all over your scope like you have a nervous twitch in your hand. And this mission also has the most saber battles for the first set of missions.
I quicksaved about 15-20 times and never died in this mission.
Mission 5: Emergency Assistance

At this time Kyle gives you the opportunity to return to the Academy, or to immediately accept the last mission, so you take the last mission (and force point) to perform some emergency assistance for the Bukurans. In the briefing you are told that the Bukurans lost contact with a vital power station on the top of a volcano, and a team was sent to investigate, but they have not reported back. Kyle tells you that this one is bit dicey, so he will meet you there and you will do it together. You put your Force point into Mind Trick and grab a Tenloss rifle and bowcaster and thermal detonator and head out.

You arrive, and wait for Kyle… and wait… and wait… and decide to go in alone. Judging from the briefing alone, you are not exactly certain what has happened, but as you approach the main entrance you see a body and pockmarks from blaster fire. You enter the main door, and see two exits and a computer panel; one door is semi-barricaded, allowing someone to easily defend it, and both doors are locked. A closer inspection of the computer panel allows you to look on a remote camera that shows two imperial commandos setting a bomb in some room inside the facility somewhere. Upon further probing you discover that the imperials have set five bombs throughout the entire facility, but you reveal yourself to some stromtroopers in the next room, and they come out of the barricaded door to investigate, you greet them with a quick jolt of lightning, killing them both. In the next room you come across a shield recharge station, and a set of stairs spirals up to the rest of the facility, a closer look under the stairs shows there are some items under them, and a quick roll puts you down there to collect them, and a chime sounds followed by a message telling you that you found one of the secret areas in the facility. At the top of the stairs and through a door, you spot two more stromtroopers and a forking path. You cook the two troopers with lightning, and then inspect your two paths; to go straight ahead you will have to disarm a hallway rigged with laser trip mines, so you take the easier path, knowing that you may have to come back.

The hallway then turns back to the right, and peeking around the corner you spot something odd. Something is distorting the light in the hallway; you turn on your Force sight to reveal an imperial commando with a cloaking device is waiting for you, but with force sight, he stands out plain as day. Imperial commandoes are much tougher than stormtroopers, they can survive several blaster shots, and even glancing lightsaber hits (no one survives direct saber hits), and they always have cloaking devices making them dangerous if you are not expecting them. You move in and cut him down before he gets a shot off. At the end of that hallway you come to a control room guarded by a few stromtroopers that are quickly shocked to death. The controls in this room are shut off, but there is an ammunition recharge station here, you make note of it for future reference, because all of your weapons are fully charged at this time.

The next hallway from the control room was damaged and is venting hot gasses and shooting spurts of flame, so you take your time to cross over and under each of the danger spots. Through the next door the hallway forks again, a ramp leads down to the right, and another door is unlocked directly in front of you. Unfortunately there is a floor turret gun that has been set up in the middle of the hallway and is turning to fire on you. You quickly lightning the turret and destroy it, and spot another imperial commando standing cloaked at the bottom of the ramp hoping to avoid detection, so you roll down the ramp and stab him, only to find the door behind him locked by security key. (Again you can’t cut the door open with your saber, D’oh) So you head down the unlocked path to another mine rigged hallway, so you decide to chance it this time, and whip out a blaster rifle and shoot the mines off the walls blowing them up for a safe distance. At the end of the hallway you find two stromtroopers and an imperial officer, you fry them up, and snag the officer’s security key (it smells like hot dogs) and head back to the locked door, but not until you check the next room and locate one of the five bombs and disarm it, and stop at the shield recharge station.


Opening the security door takes you outdoors again, but this time on the other side of the facility. You fry two more stromtroopers, and then take a bridge and the path once again forks so you take the right fork. Down this path you wind through another room, then a locked door is blasted open from the other side, and two more troopers and an officer step out to silence you, poor them, they died very quickly.
Just a note about full power lightning, it can kill multiple stromtroopers in about 2 seconds, using less than 20 force power. (This is very cheap) Officers take about 1 more second to kill, along with most mercenaries. Then imperial commandoes and brown masked mercenaries take about 5 full seconds of lightning to kill, which is about 60-70 force power. Having level 3 lightning early in the game, makes stormtroopers an almost ignorable threat.
As you pass through the blasted open door, you find yourself in the first indoor room in the entire facility, the one with the camera station. So, since you are back at the beginning, you head to the first hallway that was rigged up with trip mines and disarm them all, and move through to find another bomb set up by the imperials, so you disarm this one and move on. You go back to the rear, outdoor portion of the facility where you ignored the left fork. As you are walking along, you see some windows that are overlooking your position, you hear a voice shout at you, then one of the windows explodes, and you hear the death throes of several imperials inside, that blew themselves to smithereens trying to paste you.


You round a corner and enter a pathway littered with crates positioned to create cover, and there are some silo looking structures, and in front of the closest one a stormtrooper has done something intelligent. He has taken the reigns of mounted deck gun and pointed it at you and has begun firing. Fortunately for you, you are safe behind some heavy crates; you lean out to one side and disintegrate to poor sucker with your Tenloss rifle. And to make sure that no one else has that bright idea of using the deck gun, you destroyed it with lightning. There is another locked door to your right, and two small structures before you. You go through the two small buildings and kill the single commando and stormtrooper that are guarding them. As you emerge from the last building, you spot an imperial officer with his back to you standing near one of the bombs off in the distance. You disintegrate the officer, then sprint out to disarm the bomb he was guarding, only to find a security key he was carrying is resting, unscathed on the ground. (Good thing it is undisintegrateable)
You take the key back to the locked door, that you just passed and open it, inside there are some imperials to lightning, items to collect, and an elevator that takes you upstairs. After passing through a few more rooms you come into a room with what look like generators along one wall, and some commandos on the level below you. But before you decide to tussle with those, there are some doors on your level, one leads you to the room that you first saw back on the camera that was guarded by two commandos, you saber them both and disarm that bomb they were guarding. One bomb left, but where is it?
When you go back the generator room, you drop thermal detonators on the heads of the commandos, quelling them, only to incur the wrath of a turret gun set up to guard, of all things, the last bomb! Taking cover, you produce your bowcaster and demolish the turret from a distance in one shot, then jump down and disarm the last bomb.
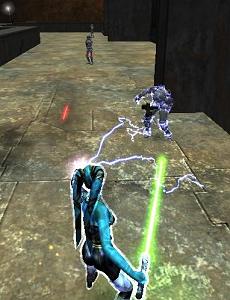
All there is to do now is to get back to your ship. You know the way, but reinforcements have arrived in the form of stuff to electrocute… I mean stormtroopers. About 5-6 stromtroopers have positioned themselves in effort to prevent your escape, but they can’t do anything to stop you from shocking them all to death, and getting back to your ship and escaping.
Kyle tells you that you did good, then orders you back to the Academy to report to Master Skywalker, and he will give special orders and assignments to each of the students, apparently something has developed while you have been busy training, and it has something to do with all of these Sith cultists that have been appearing all over the place.
I hope you have enjoyed the first installment of the Jedi Academy report. The next two parts will not have so much extraneous game info, and will have more Jedi battles. The next mission furthers the story, then you come to another set of 5 missions, and these 5 are the most fun in the game. I don’t want to spoil too much for you now, but I will give you a few teaser shots from the next mission. Lets just say that your next assignment is someplace very cold.


Signing off, The Rabid Fox
 Home
Forum
Starcraft Tournaments
Home
Forum
Starcraft Tournaments


